Halloween Sugar Cookies: 5 Effortless Fixes for Chilly, Make-Ahead October Afternoons
The Comfort Intro (Short & Sweet)
Halloween sugar cookies are one of those recipes I come back to every single October, whether the kids are small and excited or grown enough to pretend they aren’t. In our house, they’re less about fancy decorating and more about having something warm and familiar on the counter while the wind rattles the windows and the days get shorter.
I usually make these on a grey afternoon when supper is already planned and the house feels a bit quiet. The oven adds some warmth, the smell of butter and vanilla fills the kitchen, and there’s something grounding about rolling dough while the weather does whatever it’s doing outside. These Halloween sugar cookies aren’t flashy. They’re steady, soft, and dependable—just like a good fall recipe should be.
They’ve earned their place here because they work. They’re affordable, they make enough to share, and they freeze beautifully if you want to get ahead before the busy stretch of October really hits.
Why This Recipe Works
I’ve tried a lot of sugar cookie recipes over the years, and many of them promise perfection but fall apart the moment real life gets involved. This one doesn’t.
First, it’s affordable. The ingredients are pantry basics: flour, sugar, butter, eggs. No specialty flours, no pricey extracts, no last-minute runs to the store. Even with the cost of butter these days, this recipe still comes in at a reasonable cost per cookie—especially if you buy butter on sale and keep it in the freezer, which I always do heading into baking season.
Second, it’s filling in the right way. These Halloween sugar cookies aren’t thin or brittle. They’ve got a bit of substance, which means one or two actually feels like a treat instead of leaving everyone rooting around the cupboard for something else ten minutes later. That matters when you’re feeding a family or hosting kids who’ve just come in from the cold.
Third, they hold up well. The dough can be made ahead and chilled overnight. The baked cookies keep nicely for several days in a sealed container, and they freeze without losing their texture. That makes them practical during a busy week when there’s already a lot going on—school events, costume prep, and the usual everyday life.
And finally, they’re forgiving. If the dough is a bit soft, you chill it longer. If a tray browns faster than expected, you rotate it. Nothing about this recipe demands perfection, which is exactly why it’s become a staple.
Pantry & Fridge Reality (Ingredients)
I like to talk through ingredients the same way I would with a neighbour leaning against the counter, coffee in hand.
Flour
All-purpose flour is what I use, and what this recipe is written for. No need to complicate things. I usually buy a large bag and keep it in a sealed bin, especially heading into fall when baking tends to pick up. Cost-wise, flour is still one of the best-value staples in the kitchen.
Butter
Real butter matters here for flavour and texture. I use unsalted so I can control the salt myself. If butter prices are high, this is a good recipe to use butter you picked up on sale and froze. Let it soften properly—cold butter will fight you every step of the way.
Sugar
Regular white granulated sugar keeps these cookies light and crisp around the edges. Brown sugar makes them softer, but it also spreads more and changes the flavour. For classic Halloween sugar cookies, white sugar is the way to go.
Eggs
Two large eggs, straight from the fridge is fine. They help bind the dough and give the cookies structure without making them cakey.
Vanilla
Pure vanilla extract if you have it, artificial if that’s what’s on hand. I’ve used both. The cookies will still taste good either way.
Baking Powder
This gives the cookies just enough lift to stay tender without puffing up too much and losing their shape.
Salt
A small amount makes all the difference. It balances the sweetness and brings out the butter flavour.
Optional Decorating Items
This is where you can decide how simple or involved you want to be. Coloured sugar, basic icing made from icing sugar and milk, or store-bought icing tubes all work. I usually keep it simple—sprinkles or a light glaze—because the cookies themselves are the main event.
As for cost, when I break it down, these Halloween sugar cookies come in at roughly 30–40 cents per cookie, depending on butter prices and how much decorating you do. That’s reasonable for a seasonal treat, especially one that makes a generous batch.
The Cooking Journey (Experience-Based, Step-by-Step)
Getting Started: Prep That Sets You Up
I always start by taking the butter out of the fridge at least an hour before I plan to bake. In cooler months, butter takes longer to soften, and trying to rush it usually leads to frustration. You want it soft enough to press with a finger but not melting or greasy.
Once that’s ready, I clear a good-sized space on the counter. Rolling cookies takes room, and it’s easier when you’re not dodging mail, school papers, or yesterday’s dishes.
I preheat the oven to 350°F and line two baking sheets with parchment paper. Even if I’m not baking right away, having the oven ready reminds me the kitchen is in work mode.
Mixing the Dough: Steady and Unrushed
First, I cream the softened butter and sugar together in a large bowl. I use a hand mixer most of the time, but a wooden spoon works too if the butter is soft enough. I mix until the mixture looks pale and a bit fluffy. This step matters more than people think—it helps create a tender cookie.
Next, I add the eggs one at a time, mixing well after each one. The dough might look a little curdled at this point, especially if the eggs were cold. That’s normal. Once the dry ingredients go in, it smooths out.
Then I mix in the vanilla.
In a separate bowl, I whisk together the flour, baking powder, and salt. I’ve learned the hard way that skipping this step can leave you with uneven cookies—some puffy, some flat.
After that, I gradually add the dry ingredients to the wet mixture, mixing on low speed or stirring gently. Once it comes together into a soft dough, I stop. Overmixing at this stage can make the cookies tough.
Dough Resting: Don’t Skip It
This is one of the biggest lessons I’ve learned over the years: sugar cookie dough needs rest. I divide the dough in half, flatten each half into a disc, wrap them in plastic wrap, and put them in the fridge for at least an hour.
If I’m short on time, I’ve tried rolling right away, and it almost always leads to sticky dough, misshapen cookies, and frustration. Chilling firms everything up and makes the next steps much calmer.
Rolling and Cutting: Slow and Practical
Once the dough is chilled, I lightly flour the counter and rolling pin. I take one disc out of the fridge and let it sit for a few minutes so it’s not rock-hard.
I roll the dough to about ¼-inch thickness. Thinner cookies bake faster but dry out more easily. Thicker ones stay soft in the middle, which I prefer.
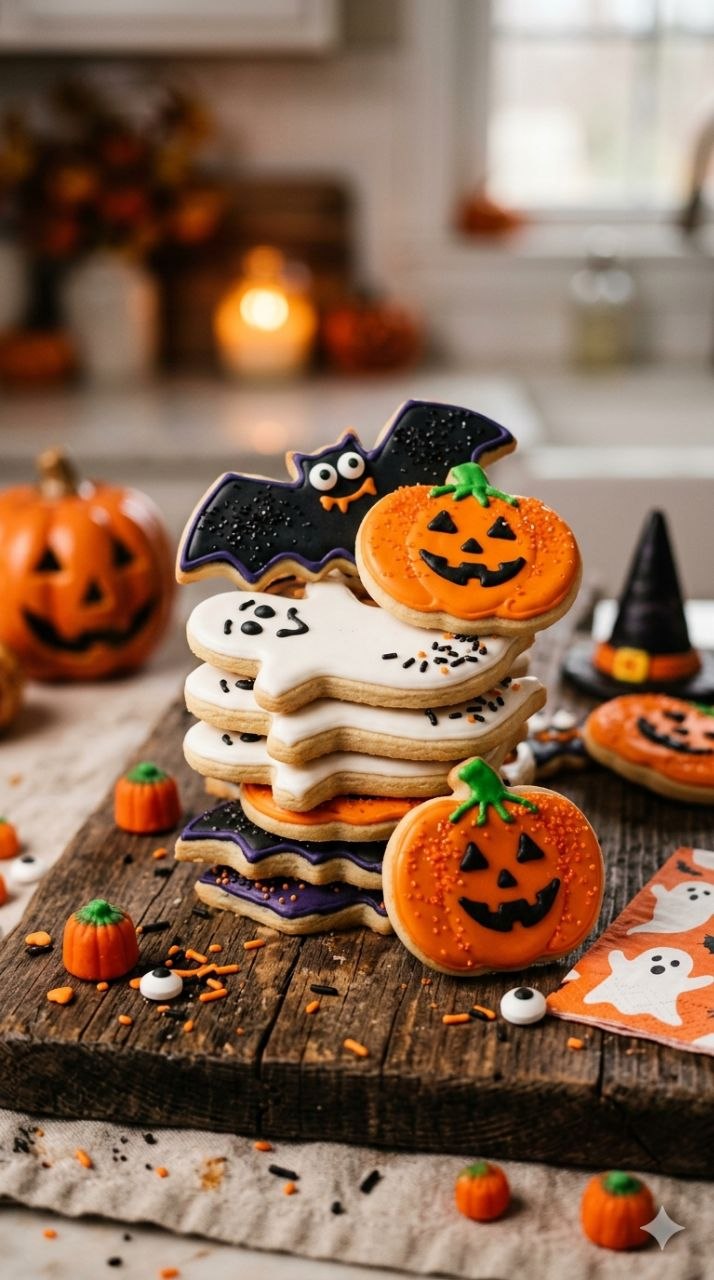
Using simple Halloween-shaped cookie cutters—pumpkins, ghosts, bats—I cut out the cookies and place them on the prepared baking sheets, leaving a bit of space between each one. They don’t spread much, but they still need room.
Baking: Watching and Adjusting
I bake one tray at a time on the middle rack. In my oven, they take about 9–11 minutes. I watch for the edges to just barely start turning golden. The tops should still look pale.
When they come out, I let them rest on the tray for a couple of minutes before moving them to a rack to cool completely. They firm up as they cool, and moving them too soon can cause breakage.
Real-Life Mistakes I’ve Made (And How to Fix Them)
- Butter too soft or melted
This leads to cookies that spread too much. If it happens, chill the dough longer before rolling. - Skipping the dough chill
The dough sticks, stretches, and loses shape. Put it back in the fridge for 20–30 minutes and try again. - Over-flouring the counter
Too much flour makes dry cookies. Use just enough to prevent sticking. - Overbaking
Even one extra minute can dry them out. Pull them while they still look slightly underdone. - Crowding the baking sheet
Cookies bake unevenly. Fewer cookies per tray gives better results. - Decorating before fully cool
Icing melts and runs. Let the cookies cool completely before decorating.
Every one of these mistakes has happened in my kitchen, usually on a busy day. The good news is that none of them ruin the batch if you know how to adjust.
Feeding the Family & Leftover Logic
I usually serve Halloween sugar cookies after supper, once the kitchen is tidied and everyone’s settled. One or two cookies with a glass of milk or a mug of tea feels just right.
For storage, I keep them in an airtight container at room temperature. They stay fresh for about four days. If I’m baking ahead, I freeze the undecorated cookies in layers with parchment between them. They thaw quickly and can be decorated later.
Leftover cookies also make good lunchbox treats or afternoon snacks on chilly days. They’re sturdy enough to travel without crumbling.
Variations for Different Days
The Busy Day Version
Make the dough in the morning or the night before. Bake and decorate simply with coloured sugar instead of icing.
The Sunday Version
Take your time. Roll the dough thicker, bake slowly, and decorate with homemade icing once everything’s cooled.
Seasonal Twist
Add a pinch of cinnamon or nutmeg to the dough for a warmer flavour.
Dietary Adjustment
Use a good-quality dairy-free butter substitute. The texture changes slightly, but the cookies still work.
Freezer-Friendly Plan
Freeze half the dough for later in the month. Thaw overnight in the fridge when needed.
Common Questions (Neighbourly FAQ)
Can I make these ahead of time?
Yes. The dough keeps in the fridge for up to two days, and baked cookies freeze well.
Why did my cookies spread?
Usually the butter was too warm or the dough wasn’t chilled long enough.
Can I use margarine instead of butter?
You can, but the flavour and texture won’t be quite the same.
Do I need fancy decorating tools?
No. A spoon and a small bowl are plenty.
How thick should I roll the dough?
About ¼ inch for soft cookies that hold their shape.
Can kids help?
Absolutely. Cutting shapes and adding sprinkles are great jobs for them.
Closing (Grounded Reassurance)
These Halloween sugar cookies aren’t about perfection. They’re about showing up, using what you have, and making something warm and familiar during a busy season. I keep coming back to this recipe because it works, even when the day doesn’t go exactly as planned.
Over the years, I’ve learned that confidence in the kitchen comes from reliable recipes like this one—ones that forgive small mistakes and still turn out well. That’s why these cookies keep earning their place every October, no matter how long the to-do list gets.
Recipe Card: Halloween Sugar Cookies
Prep Time: 25 minutes
Cook Time: 10 minutes per batch
Total Time: 1 hour 45 minutes (including chilling)
Servings: 30–36 cookies
Calories: ~150 per cookie (varies with size and decorations)
Ingredients
- 1 cup unsalted butter, softened (buy on sale, freeze extras)
- 1 cup granulated sugar
- 2 large eggs
- 2 teaspoons vanilla extract
- 3 cups all-purpose flour
- 2 teaspoons baking powder
- ½ teaspoon salt
Optional Decorations:
- Coloured sugar or sprinkles
- Simple icing (icing sugar + milk)
Method
- Preheat oven to 350°F and line baking sheets with parchment paper.
- In a large bowl, cream butter and sugar until pale and fluffy.
- Add eggs one at a time, mixing well after each addition. Stir in vanilla.
- In a separate bowl, whisk flour, baking powder, and salt.
- Gradually mix dry ingredients into wet ingredients until a soft dough forms.
- Divide dough in half, flatten into discs, wrap, and chill for at least 1 hour.
- Roll dough on a lightly floured surface to ¼-inch thickness.
- Cut into shapes and place on prepared baking sheets.
- Bake for 9–11 minutes, until edges are just starting to turn golden.
- Cool on trays briefly, then transfer to racks to cool completely before decorating.
If you’d like, next time we can build this into a full October baking week—one dough, a few variations, and enough treats to get through Halloween without scrambling at the last minute.