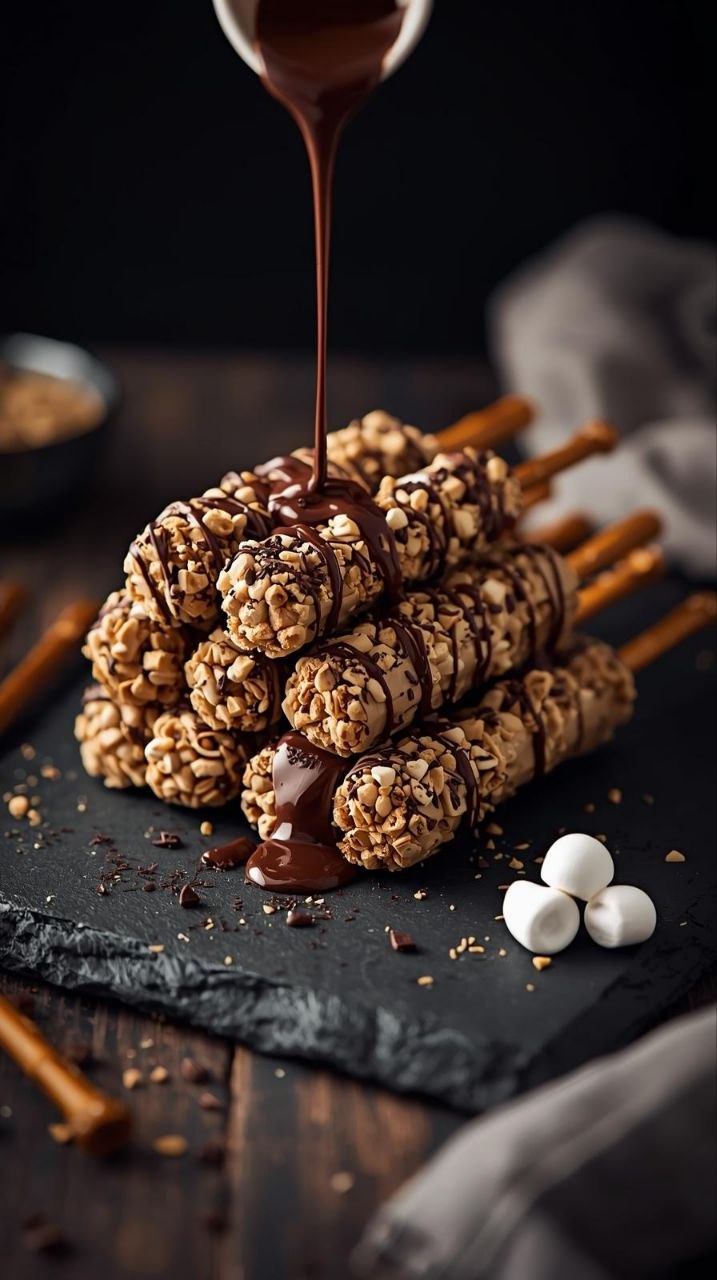
S’mores Pretzel Rods: 6 Effortless Fixes for Bake Sales, Winter Gatherings & Quiet Treat Days
The Comfort Intro (Short & Sweet)
S’mores pretzel rods are one of those simple treats that quietly earn their keep in our house. I started making them years ago for school bake sales and winter gatherings, and they’ve stuck around because they’re easy, affordable, and don’t require turning the kitchen upside down.
I usually make them on a grey afternoon — the kind where it’s too cold to head out again, and everyone’s hovering, looking for “just a little something sweet.” They’re not fancy, but they feel thoughtful. Sweet, salty, crunchy, and familiar, all wrapped up on a stick you can hold with one hand while you’re doing something else.
In a cold climate, I find recipes like this matter. They don’t heat up the whole house, they use pantry staples, and they make enough to last a few days — if they’re not eaten straight off the tray.
Why It Works
S’mores pretzel rods work because they’re practical food pretending to be a treat.
First, they’re affordable. Pretzel rods are inexpensive, especially when bought in bulk. Chocolate chips and marshmallows are often on sale around holidays, and graham crumbs can be made from whatever’s left in the cupboard. I can usually make a full batch for far less than buying packaged treats, and I know exactly what went into them.
They’re also filling in a quiet way. The pretzel gives real crunch and substance, not just sugar. One or two is usually enough, which makes them ideal for families where you want something satisfying without a sugar crash an hour later.
They keep well, too. Once set, these s’mores pretzel rods last several days in a cool room or pantry. They don’t get soggy, they travel well, and they’re easy to pack into lunch bags or containers for later. In winter, I’ll sometimes make a double batch on Sunday and tuck them away for the week.
Portion-wise, one rod per person works for an after-dinner treat, and two for teenagers or guests who’ve been outside shovelling snow all afternoon. From a cost standpoint, you’re looking at roughly $0.60–$0.80 per rod depending on ingredients and sales, which is very reasonable for a homemade dessert.
Seasonally, they make sense year-round, but I especially like them in colder months. There’s something comforting about the familiar s’mores flavour when you’re not actually lighting a fire. It’s easy comfort food Canada-style — familiar flavours, no fuss, and made indoors with your boots by the door.
Pantry & Fridge Reality (Ingredients)
I always think of ingredients the way I’d explain them to a neighbour leaning on the counter.
You’ll need pretzel rods first. The long, sturdy kind work best. If the store is out, shorter rods or thick pretzel sticks will do, but they’re a bit messier. I usually grab the no-name brand — they’re cheaper and honestly just as good.
Chocolate is next. Chocolate chips melt evenly and are easy to find. Milk chocolate gives the most classic s’mores flavour, but semi-sweet works fine if that’s what you have. I’ve even mixed the two when the bag was running low. Buying chocolate chips in larger bags at Costco or during holiday sales saves a fair bit over time.
Marshmallows can be mini or regular. Minis are easier to sprinkle and control. If you only have large ones, chopping them up with kitchen scissors works well. Slightly stale marshmallows actually behave better than very fresh ones, which can melt too fast and slide off.
For graham crumbs, I usually crush graham crackers myself in a zip-top bag. It takes a minute and avoids buying specialty crumbs. If grahams are pricey or unavailable, digestive biscuits or plain vanilla cookies work surprisingly well.
Optional extras include a bit of butter or oil for thinning the chocolate if needed, and parchment paper to keep cleanup simple.
Approximate cost per serving (one rod) tends to land under a dollar, especially if you’re using pantry odds and ends. That’s part of why I keep coming back to this recipe.
The Cooking Journey (Experience-Based, Step-by-Step)
I start by setting myself up properly, because this recipe moves quickly once the chocolate melts.
First, I line a large baking sheet with parchment paper and clear a space on the counter. I lay out the pretzel rods so they’re ready to go. Having everything within reach matters here — melted chocolate waits for no one.
Next, I melt the chocolate. I usually do this in the microwave, in a microwave-safe bowl, heating in short bursts and stirring between each one. I keep the power moderate and stop as soon as it’s smooth. Overheating is the quickest way to ruin chocolate, and I’ve done that more times than I care to admit.
Once the chocolate is melted, I let it sit for a minute. If it’s too hot, it’ll run right off the pretzels instead of clinging.
I dip each pretzel rod into the chocolate, using a spoon to help coat about two-thirds of the rod. I gently tap off the excess against the bowl. You can hear the soft clink of pretzel on ceramic, and that’s usually when the kitchen starts smelling like warm chocolate — always a good sign.
After that, I sprinkle marshmallows over the chocolate while it’s still wet. I don’t press them in too hard; just enough so they stick. Then come the graham crumbs, sprinkled generously so they cling to the chocolate and marshmallows together.
Once that’s done, I lay the rods back onto the parchment. At this point, I usually pause to assess. If the chocolate is setting too quickly, I work in smaller batches. If it’s too runny, I give it another minute to cool.
To finish, I let the rods set at room temperature in winter, which usually takes about an hour. If the kitchen is warm, I slide the tray into the fridge for 15–20 minutes.
Real-Life Mistakes (and Fixes)
- Chocolate scorched and grainy
This happens if it’s overheated. There’s no fixing scorched chocolate, but you can prevent it by using lower heat and stirring often. - Chocolate sliding off the pretzels
Usually too hot or too thin. Let it cool slightly before dipping, or stir in a bit more solid chocolate. - Marshmallows melting into the chocolate
The chocolate was too warm. Waiting just a minute longer before topping makes a big difference. - Graham crumbs not sticking
Sprinkle them sooner, while the chocolate is still wet. If needed, lightly press them in. - Pretzels snapping during dipping
This happens if you push too hard. Use a spoon to help coat instead of forcing the pretzel into the bowl. - Finished rods sticking to the paper
Let them set fully before moving, and use parchment, not wax paper.
These are small things, but they’re the sort you only learn by making the recipe a few times.
Feeding the Family & Leftover Logic
I usually serve s’mores pretzel rods on a plate in the middle of the table and let everyone help themselves. One per person after dinner is usually enough, especially if there’s tea or hot chocolate involved.
For kids, I sometimes cut them in half once they’re set — easier to manage and stretches the batch further. For adults, they’re perfect with coffee mid-afternoon.
Leftovers keep well in an airtight container for up to five days. I store them in a cool pantry, or the fridge if the house is warm. They don’t lose their crunch, and the flavours actually settle nicely by the next day.
If they’ve been in the fridge, I let them sit out for a few minutes before serving so the chocolate isn’t rock-hard.
Variations for Different Days
The Busy Day Version
Use mini pretzels instead of rods and spoon the chocolate over them. Faster, less dipping.
The Sunday Version
Use good-quality chocolate bars chopped up, and toast the marshmallows lightly under the broiler before topping for extra flavour.
Winter Pantry Version
Use digestive biscuit crumbs instead of grahams and dark chocolate for a deeper flavour.
Nut-Friendly Version
Add sunflower seeds or crushed pretzels instead of nuts for schools with restrictions.
Holiday Tray Version
Drizzle with white chocolate once set and sprinkle lightly with festive sugar.
Common Questions (Neighbourly FAQ)
Can I make s’mores pretzel rods ahead of time?
Yes. They’re actually better the next day and keep well for several days.
Do I need special chocolate for melting?
No. Regular chocolate chips work fine if you melt them gently.
Can I freeze them?
I don’t recommend it. The pretzels can lose their crunch once thawed.
What if I don’t have graham crackers?
Digestives, vanilla wafers, or even plain cookies crushed up will work.
Are these good for bake sales?
Very. They travel well and hold their shape.
How many does this recipe make?
Usually 12–16 rods, depending on how heavily you coat them.
Closing (Grounded Reassurance)
S’mores pretzel rods keep earning their place in my kitchen because they’re reliable. They don’t demand special tools, they don’t create a mountain of dishes, and they use ingredients I already have most of the time.
During long weeks and cold evenings, recipes like this build quiet confidence. You make them once, then again, and before long you don’t need to think about it. That’s the kind of cooking I trust — steady, unfussy, and good enough to share.
Recipe Card: S’mores Pretzel Rods
Prep Time: 20 minutes
Cook Time: 5 minutes
Total Time: 25 minutes plus setting time
Servings: 12–16 rods
Calories: ~180 per rod (varies by chocolate and toppings)
Ingredients
- 12–16 pretzel rods (bulk pack, budget-friendly)
- 1½ cups chocolate chips (milk or semi-sweet)
- 1 cup mini marshmallows, or chopped large marshmallows
- ¾ cup graham cracker crumbs (about 6 crackers)
- 1 tsp butter or oil (optional, for thinning chocolate)
Method
- Line a baking sheet with parchment paper and set aside.
- Melt chocolate chips gently in the microwave or over a double boiler, stirring until smooth.
- Let chocolate cool slightly so it thickens just a bit.
- Dip each pretzel rod into the chocolate, coating about two-thirds of the length.
- Sprinkle marshmallows over the chocolate while still wet.
- Sprinkle graham crumbs generously, pressing lightly to adhere.
- Place rods on prepared baking sheet and let set at room temperature or refrigerate briefly.
- Store in an airtight container once fully set.
S’mores pretzel rods are simple, steady, and satisfying — the kind of recipe that fits right into real life. And on a cold day, that’s more than enough.